These icons allow you to insert and remove several different kinds of links. You can select either a word/phrase or an image to be a link.
After deciding what you want your link to be, you need to highlight it.

Once you have highlighted the text, you need to select the “make link” icon.

When you do so, a window will appear. There are several different types of links you can make from this window.
- Link to Another Website
- Link to Other Content Pages
- Link to Module Content
- Link to Departments Module Content
- Download Link
- Anchor Link
- Removing Links
See Also: Creating a Call to Action Button
Link to Another Website
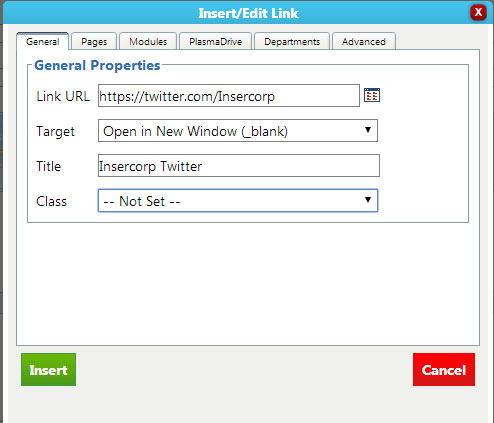
The first type of link is a link to another website, which is found in the "General" tab (the default tab).
1a.You need to copy / paste the link for the website you want to link to in the “Link URL” section.
- Don’t forget the "http//:" or “https//:” portion!
1b. In the “Target” section, use the drop down menu to select “Open in New Window.”
- We recommend using this setting because it ensures that visitors are not directed off of your site completely. When they close the tab to the external site, they do not leave your site.
1c. Set a title for the site.
Link to Other Content Pages
Pages tab allows you to link to pages within the Manage Pages section of your CMS. See the Manage Pages tutorial for more information on creating and editing pages.
2a. Select the Pages tab
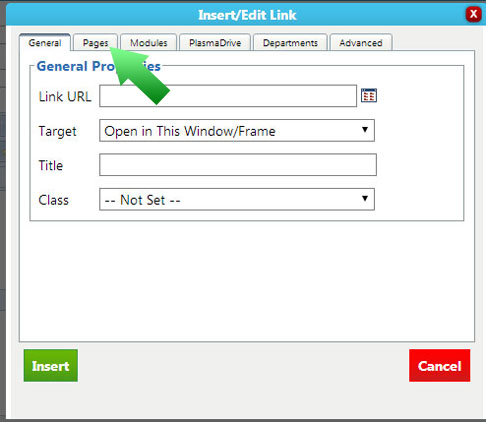
2b. When you select that tab, the following window appears.
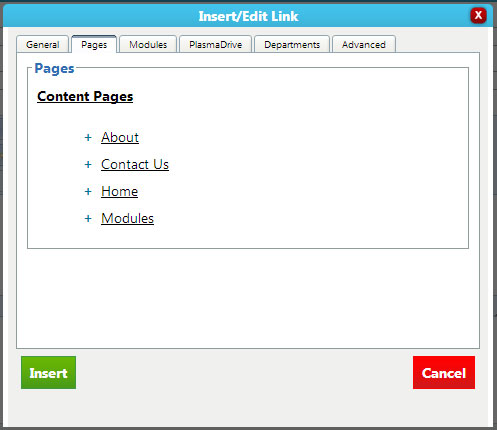
2c. Once this window appears, you need to find the page that you want to link to. Subpages are found by clicking on the plus signs next to page names.
2d. Once you find the page you want to link to, click on it. You will be returned to the “General” tab, and the options will already be filled in for you.
2e. Click “Insert” and your link is ready!
Link to Module Content
Another type of link you can create is a link to module content. The modules that you can link to are News, Events, Blog, Gallery or departments.
If you have one or more of these modules installed, clicking the “modules” tab will allow you to link to content within these modules.
If you do not have any of these modules installed, you will not see this tab.
**NOTE** If your website uses the departments module, a separate tab will appear for you to use to link to department pages. The instructions on how to use this are here.
3a. Click the Module Tab
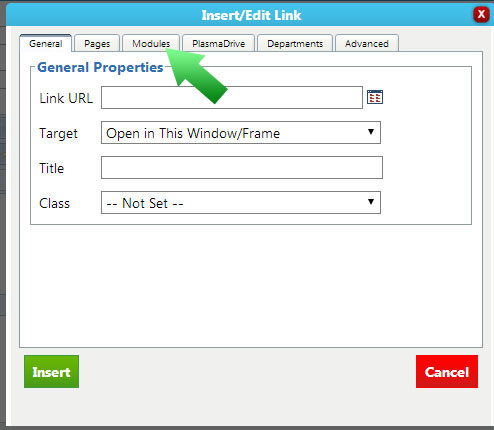
3b. When you click this tab, the following screen will appear.
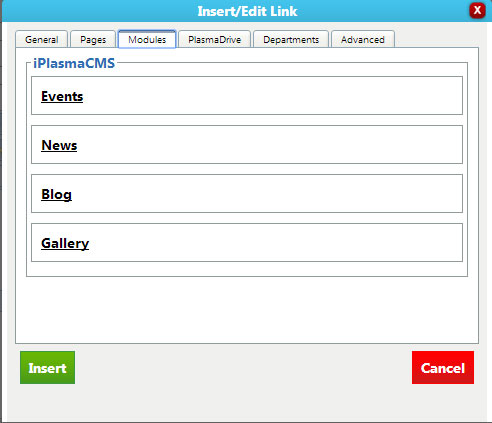
3c. Click on the module you wish to link to. A list of the linkable content will appear.
- Each module has different content that it links to.
- Events will link to a specific event or an event category
- News will link to a news article or a news category
- Blog will link to a blog category or a blog post
- Gallery will link to a category or an album.
3d. Simply select the specific content that you wish to link to, and click "Insert."
- You will again be redirected to the “general” tab, with all of the options filled in for you.
3e. Once this is done, you simply need to click insert and your link is ready.
Link to Departments Module Content
4a. Click on the “Departments” tab as shown below.
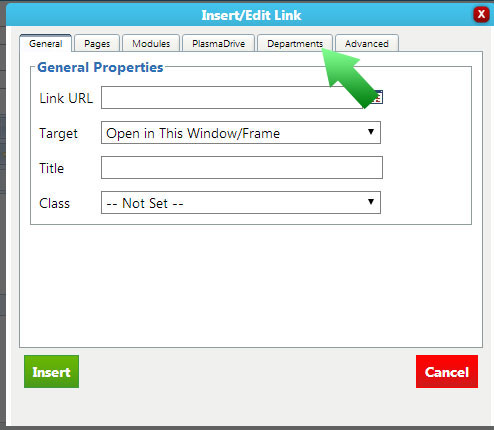
When you click on this tab, the following screen appears.
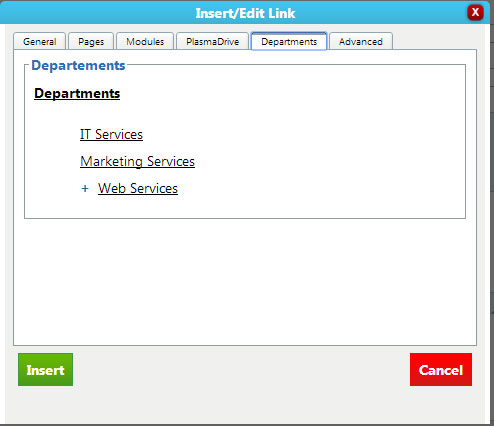
4b. Simply select the Department you wish to link to(sub departments can be seen by clicking the plus sign), and you will be returned to the “general” tab with all of the options filled in.
4c. Click “Insert.”
Download Link
Another type of link you can insert in your site is a download link.
5a. Click on the “PlasmaDrive” tab as shown below.
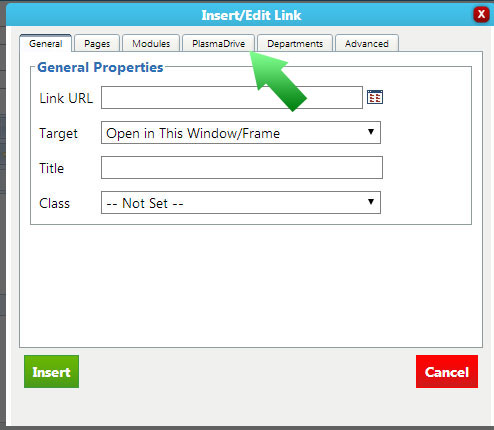
When you click on this, the following window will appear.
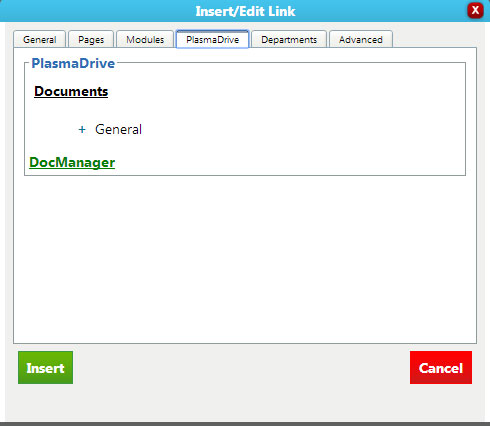
5b. Select the file you wish to create a download link to, then you will be led to the “General” tab.
- Make sure to add a title.
5c. Click “Insert,” and you have your link.
***NOTE*** If you have not uploaded your file to the PlasmaDrive, you will NOT be able to access it here. If you still need to upload the document, select “DocManager” and you will be brought to the PlasmaDrive. See PlasmaDrive instructions on how to upload a document!
Anchor Link
The final type of link is an anchor link. These are links that are used to link to specific places on the page.
To create an anchor link, we must first create an anchor. To do so, we place select the place where the anchor needs to go, then click the icon shown below.

When we click the icon, the following window appears.
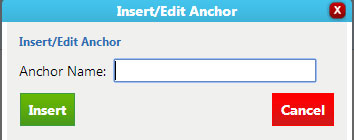
Simply type the name you want your Anchor to have into the box and click “Insert.” A small icon with an anchor on it will appear where you selected. This will not be visible on your site.
***NOTE*** All anchors must have unique names. You cannot have two anchors with the same name on the same page/article/etc. You also cannot have spaces in your anchor names. If you want to separate words, try camel case (itLooksLikeThis) or using the "_" or "-" symbols.
To put a link to the anchor, you need to follow the same steps as for a normal link. When you get to the link window, it should look like this.
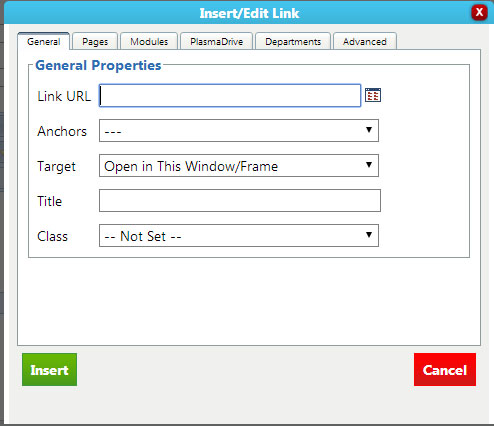
Go to the “Anchors” section. Select the arrow for the drop down menu, then select the anchor you want to link to. Then click “Insert” and your anchor is ready!
Removing Links
The break link icon unlinks the link or partial link selected. You simply need to select a link, then click the button shown below.

Note: Highlighting part of a link and using this button will result in the link only being removed from the text that is highlighted. It is recommended to click somewhere in the middle of the text and use this button to remove a link entirely.
Previous: Undo/Redo 1.2: The WYSIWYG Editor Next: Inserting Images




 Made in the U.S.A.