Tables
1a. Select the table icon as shown below.

Once you do so, the following window will appear.
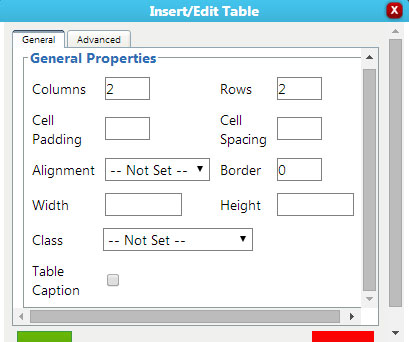
1b. Enter the number of rows and columns you wish to have in your table.
- Cell padding creates space within the cell for content.
- Cell Spacing changes the amount of space each cell has.
- Alignment sets where the table is within the page.
- Border defines whether or not you want a border.
- Width and height change the size of the table.
- Class allows there to be a value for each side.
- Table caption allows you to have caption under your table explaining it.
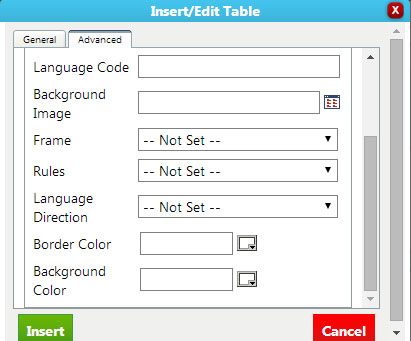
1c. Changing to the “Advanced” tab can allow you to change the color of the border and the background, as well as a background image.
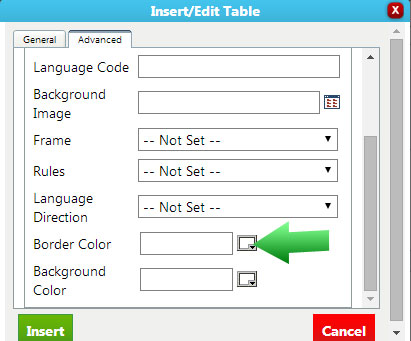
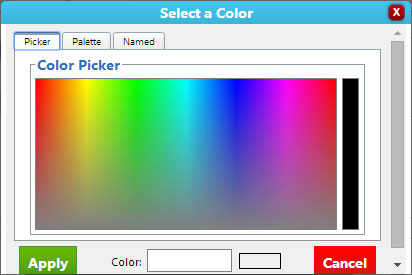
When you change the background or border colors, select the small white box to choose a color. A color picker window will appear.
Formatting Tables
After creating your table, there are many ways to modify it.
Using the “Table Row Properties icon, you can change many different portions of the table.

After selecting this icon, the following window will appear.
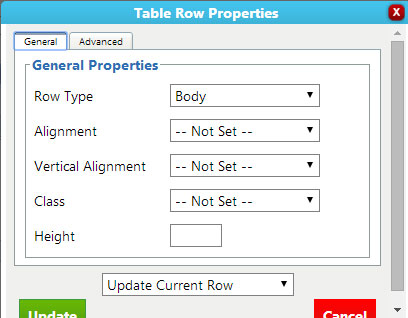
- Changing the Row Type will change where the row goes.
- The different types of alignment will change the of the content of the row with the rest of the table.
- Class changes value types.
- Height changes the height of the row.
You change the background color in the same way as on the original table window using the Advanced tab.
Using the dropdown, you can change what rows in the table are affected. This can even be used to create a table that alternates colored rows.
The following icon brings up a similar window, but it is used to select specific cells instead of whole rows. It’s called the Table Cell Properties icon.

All of the sections are the same as in the Row properties, except scope, which changes what cells are affected, similarly to the bottom dropdown in the Row properties.
The following buttons affect specific rows.
- The button pointed at below and the two buttons on the left of it each do different things.
- The first two buttons add a row either above(the first) or below(the second) the selected one.
- The third button from the left deletes the selected row

The next three buttons do the exact same thing, but to columns.

The final button combines the selected cells together into one.

«Previous 1.2.10 Source Code/Full Screen | Table of Contents | Next 1.2.12 Sub/Superscript»





 Made in the U.S.A.