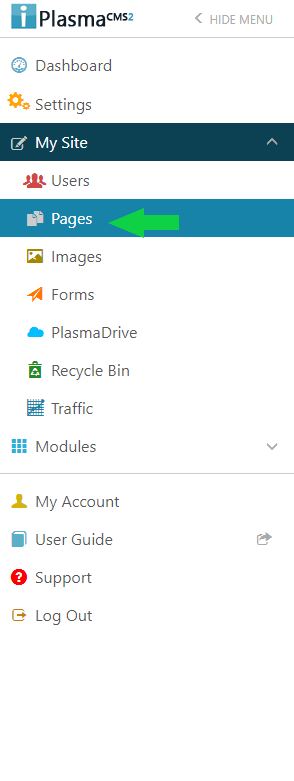
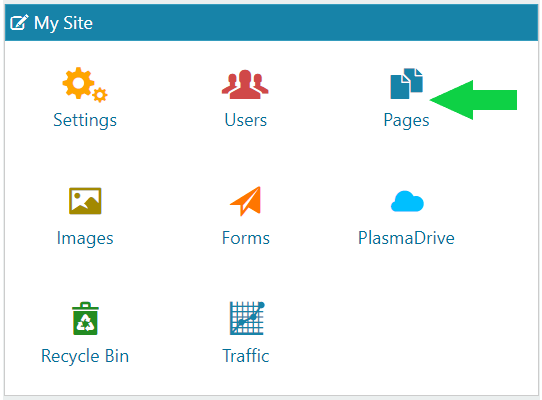
To access this section, you go to the “My Site” section and click on the “Managing Pages” button.
Manage Pages Overview
-
Pages
- Adding a Page
- Editing and Deleting Pages
- Publishing and Unpublishing a Page
- Turn Sitemap On and Off
- Moving a Page
-
Subpages
- Viewing Subpages
- Adding a Subpage
- Editing and Deleting Subpages
- Publishing and Unpublishing a Subpage
- Turn Sitemap On and Off
- Move a Subpage
-
Page Titles
-
Search Engine Optimization (SEO)
Adding a Page
1.1a. Click the “Add New Page” button as shown below.

The following window appears.
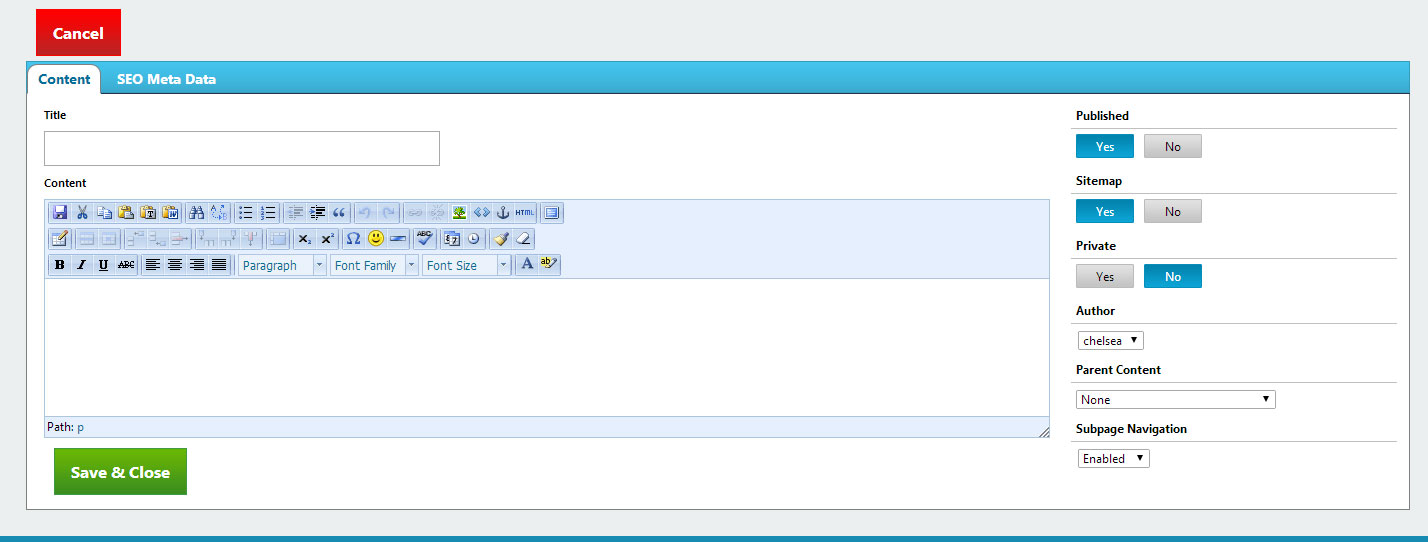
1.1b Enter your content in the WYSIWYG.
***NOTE*** For more information on how to use the WYSIWYG, see the WYSIWYG tutorial. For titling information, see the Page Title section. For information on the “SEO Meta Data” tab, see the Search Engine Optimization section.
Editing and Deleting Pages
Editing a page is very similar to Adding one, you just have to click on the page name instead of the add new page section. Then edit your content as you need to.
To delete a page, click on the red “x” as shown below.

Publishing and Unpublishing a Page
There are two ways to publish or unpublish a page.
Firstly, you can use the toggle within the WYSIWYG for the Pages editor. The section shown below can turn the Publishing off or on as you see fit.
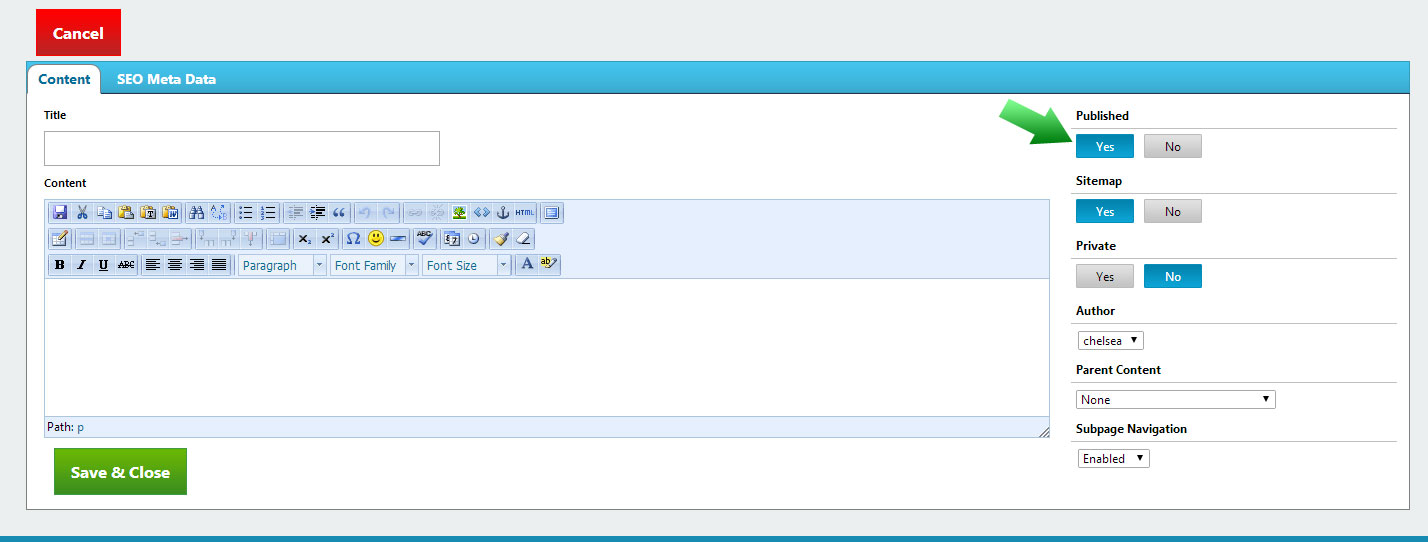
The second way can only be used if your page has already been created. From the Page Manager dashboard, simply click on the Eye icon as shown below to publish or unpublish your page.

Turning Sitemap On and Off
There are also two ways to place a site on the site map or remove it.
You can toggle it on/off within the WYSIWYG as shown below.
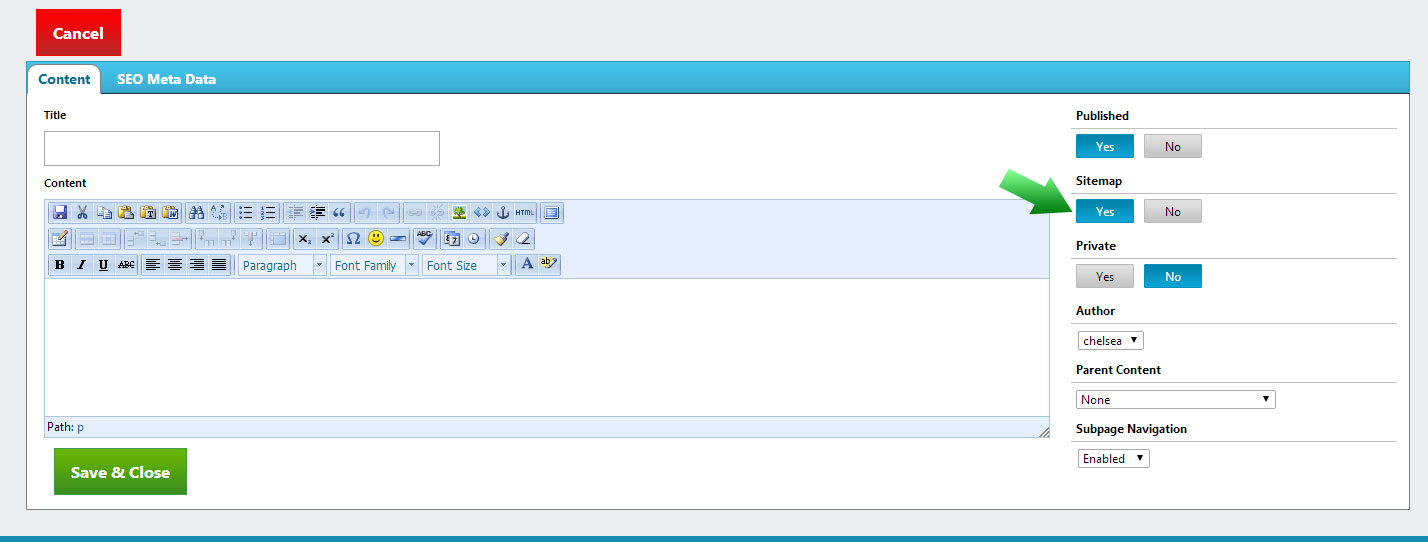
Or you can use the sitemap icon in the Page Manager dashboard if your page has already been created.

Moving a Page
1.5a Go into the page editor.
1.5b You go to the drop down menu under “Parent Content” as shown below.
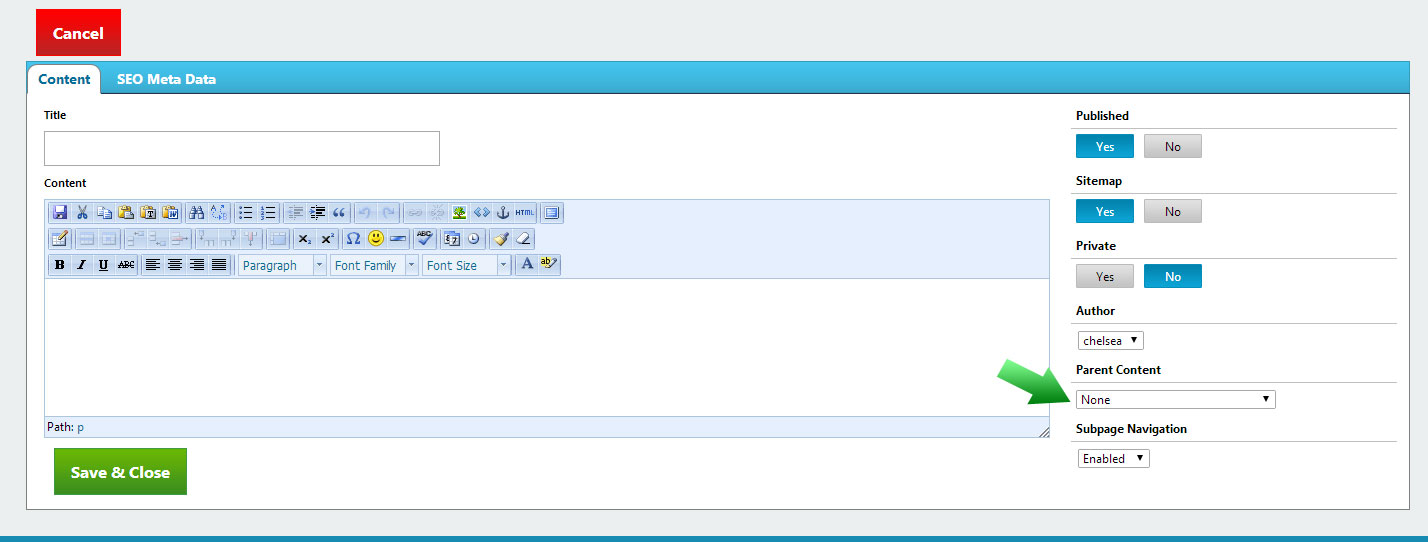
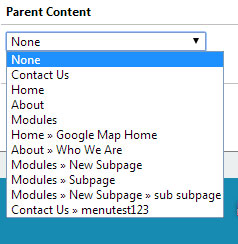
1.5c Choose the the trail you want your page to follow, then save.
Subpages
Subpages work identically to normal pages in most ways, though there are some differences.
Viewing Subpages
To access your subpages, click on the plus sign next to the page name as shown below.

Your subpages will appear with a link to add new subpages. If there are no subpages, all that will appear is the link to add a new subpage.
The number next to your page or subpage is the number of subpages it has.

***NOTE*** You can create subpages for subpages as well, the nesting ability is potentially infinite (Though it is not recommended that you do too many layers).
Adding a Subpage
Once you can see your subpages, simply click on the “add a subpage” link as shown below.

Once you do so, the WYSIWYG editor will appear and you can edit your page normally.
Editing and Deleting a Subpage
To edit a subpage, you must view your subpages, then click on the title of the page you want to edit.
To delete a subpage, first make sure the page you want to delete is visible, then click on the red “x” like for other pages.
Publishing and Unpublishing a Subpage
Once you have your subpages visible, you can publish or unpublish them in the same ways as the normal pages.
Turn Sitemap On and Off
Once you have your subpages visible, you can turn the sitemap on/off in the same ways as the normal pages.
Moving a Subpage
Once you have your subpages visible, you can move them in the same way as the normal pages.
Page Titles
Allowed Characters
In order to make our URLs Search Engine Friendly, you can only use certain characters in your page titles. These characters are listed below:
( ) ‘ , : ; ! @ * [ ] & - .
If you attempt to enter characters other than these, an error message will appear.
Changing Page Names
Because the name of the page directly corresponds to the Search Engine Friendly URL for the page here are some simple steps to make it easy to change the name of the page and allow users with the old URL to still find the page:
- Navigate to the page you wish to change the name of on your website.
- Copy the Current URL for the page you are changing the name of
- Log into the CMS
- Navigate to My Site > Pages
- Click Page you wish to change the name of to open up the Edit Page Interface
- Change the 'Page Title' field to be what you wish the pages name to be
- Save The Page
- Navigate to Settings > Shortcut Links
- Click on Add Shortcut
- Paste the URL you copied in step 2 (just needs the page/{sef-url} portion)
- Click on the 'Select Link' button
- Click on the 'Pages' tab and find the page you just renamed
- Click on the Page's Name
- Click the Green 'Insert Link' button in the popup
- Click on the 'Add Link' button to save your shortcut link
Now the previous link to that page will now properly direct users to the new page name.
Suggestions
When creating Page Titles, there are several things you need to keep in mind.
- The title of the page needs to describe the page. Visitors want to know the purpose of the page they are visiting.
- Titles need to be short. Essentially, you are trying to describe your page in as few words as possible- one to three, preferably.
- Make sure you don’t have special characters in your titles- they interfere with search engine optimization (See next section for more information on this).
Some ideas- Home, About Us, Contact Us, News, Calendar.
These are short titles that are good descriptions of what is on the pages. If your titles reflect this mindset, it will improve user experience: which means more people will like and visit your site.
Search Engine Optimization (SEO)
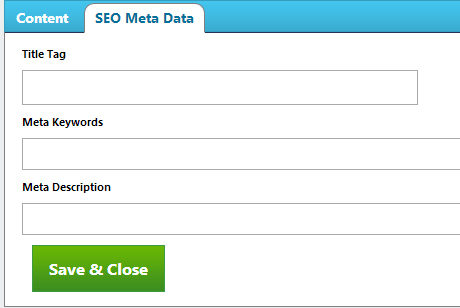
Each of these sections does something different but equally important. Title Tag shows the name of a site in search results. Meta Keywords are search keywords in order to help others find your site. Meta Description is the description of a site that you read in search results. All of these things make it easier for potential visitors to find your site.
Previous: Manage Users Table of Contents Next: Manage Images




 Made in the U.S.A.