The Slideshow Module is another one of our most popular Modules! It provides a place for you to pull a slideshow into your website or page and provides you with several features that are sure to catch the attention of your website visitors.
To access this Module, simply go to “Modules” at the top of the page, and click “Slideshow.” A screen like the one below will appear (to view enlarged image, right click on an image and select "Open image in new tab"):
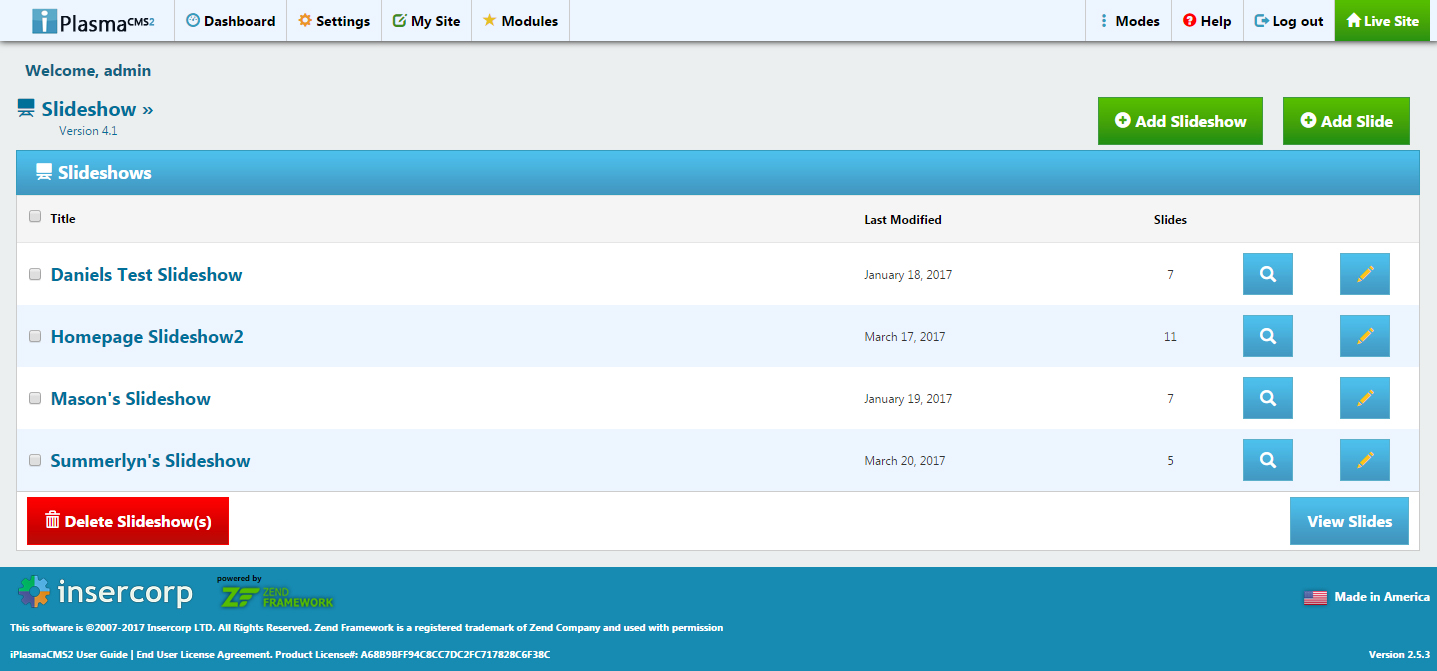
Slides
Adding Slides
1.1a. Click the green “Add Slide” button as shown below.
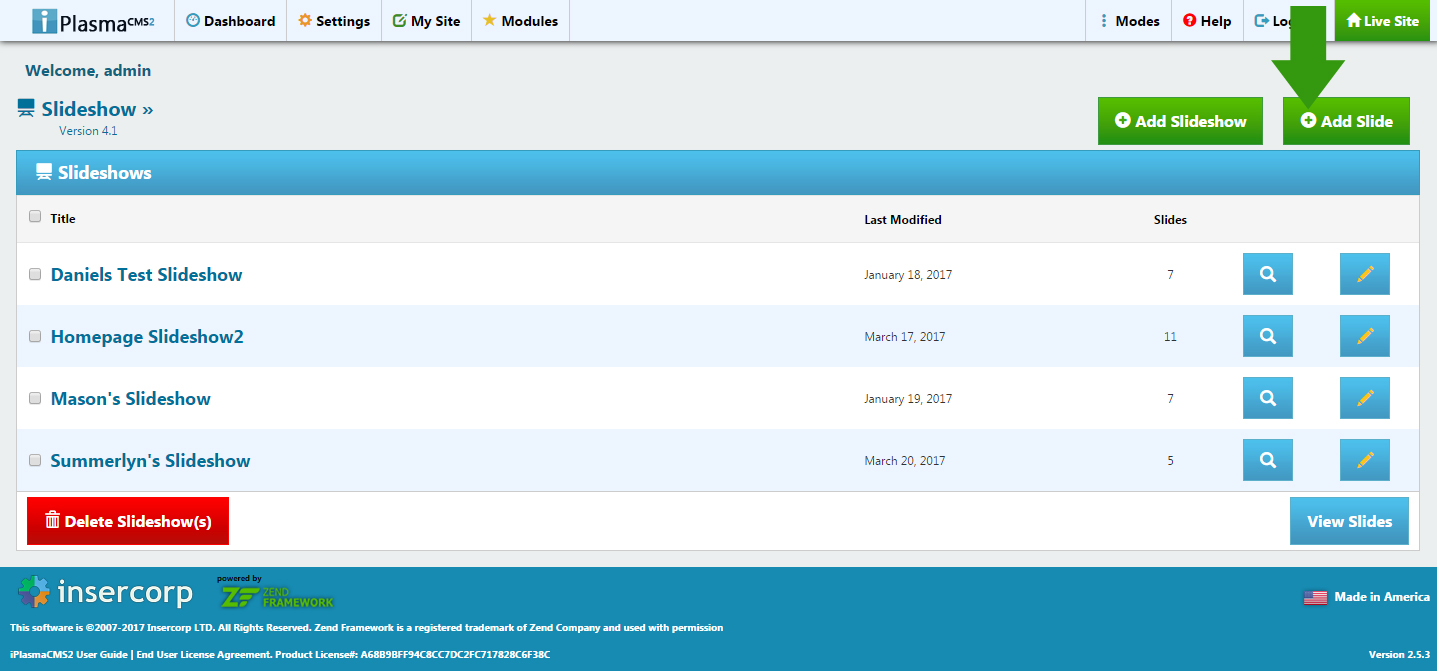
The following screen appears:
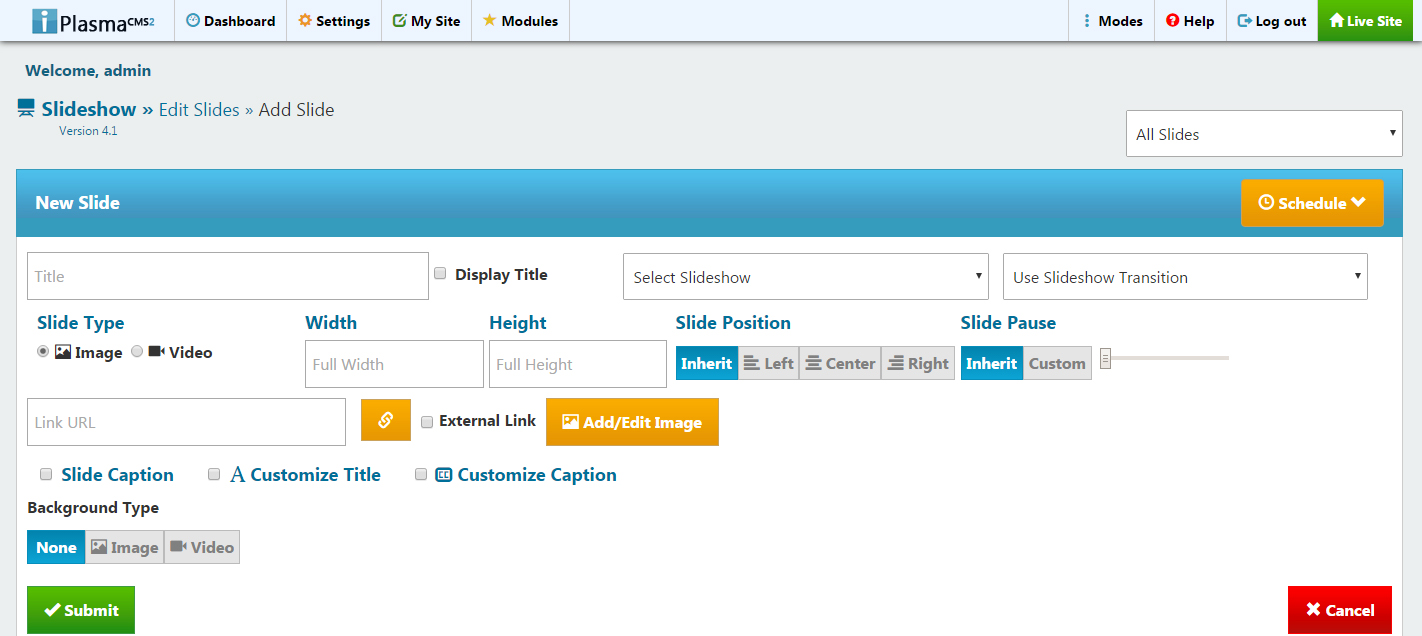
1.1b. Select the proper slideshow that you want the image to be in.
1.1c. Select the type of Transition you would like your slide to have, or just use the default Slideshow Transition.
1.1d. Add a Title and choose whether or not you would like your Title to display or not.
1.1e. Select the Slide Type - In addition to uploading an Image for your Slide, you now have the ability to upload YouTube Videos!
1.1f. Click on “Add/Edit Image” to go to the image manager and get the image.
1.1g. Insert a link for your slide to link to (event, page, etc.).
1.1h. Set a specific Width & Height for your slide, or leave blank to use the default Slideshow size.
1.1i. Select Slide Postion, or 'Inherit' to use the default position.
1.1j. Easily adjust the Slide Pause time, or 'Inherit'.
1.1k. Add a Slide Caption and Customize it, as well as the Title (or don't - just use the slideshow default settings).
1.1l. Select a Background Type (None, Image, or Video) - this will show behind the Slide image you upload.
1.1m. Once you have your slide ready, click on the “Submit” button.
Slide Scheduling
Lets say you would like to go ahead and prepare a slide for an upcoming event, contest, etc., but don't want it to show on your website just yet - Simply schedule your slide!
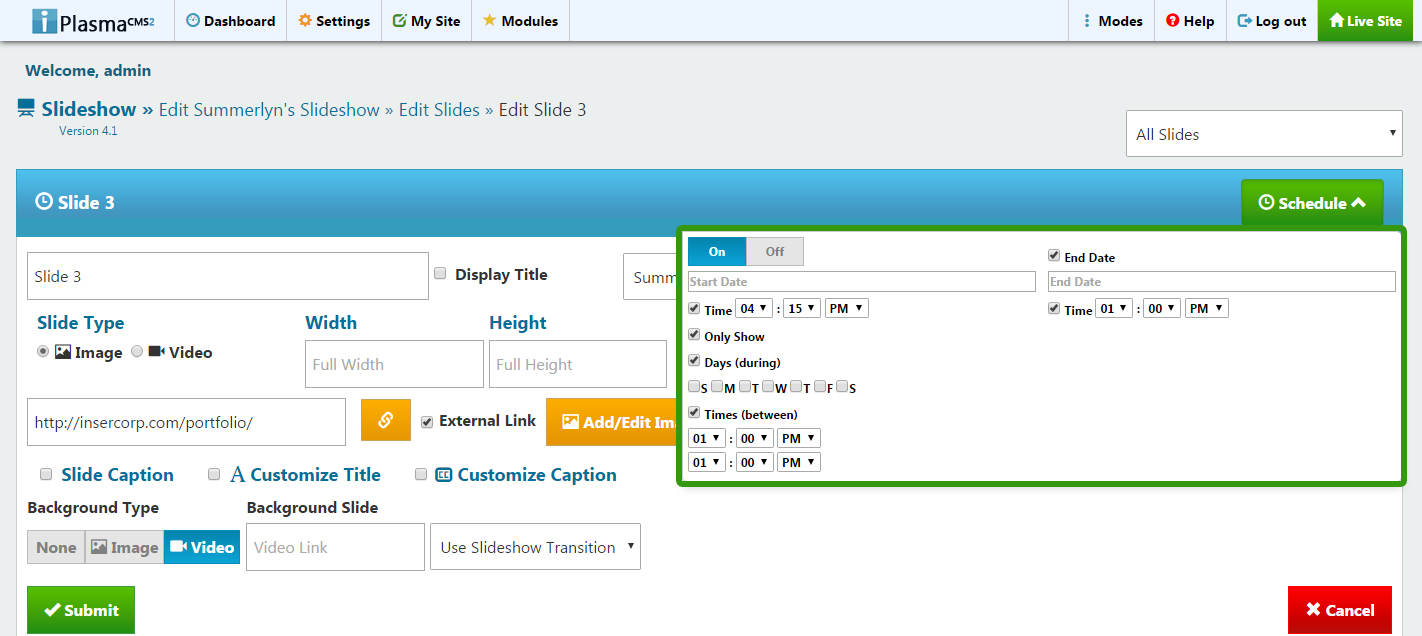
Click on the "Schedule" tab and toggle it to "On" and choose the best options for you (as shown in the image above). Click the green "Submit" button and your slide will be scheduled!
Editing and Deleting Items
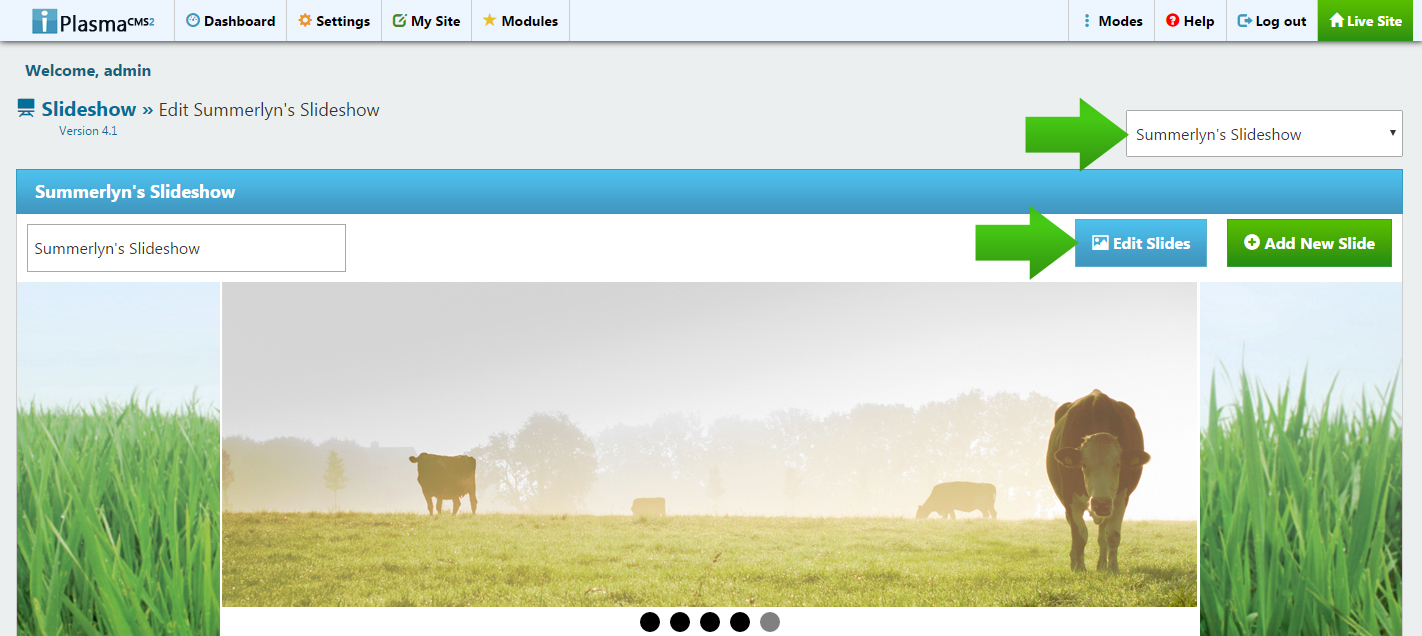
1.3a. Select a Slideshow and click the blue "Edit Slides" button:
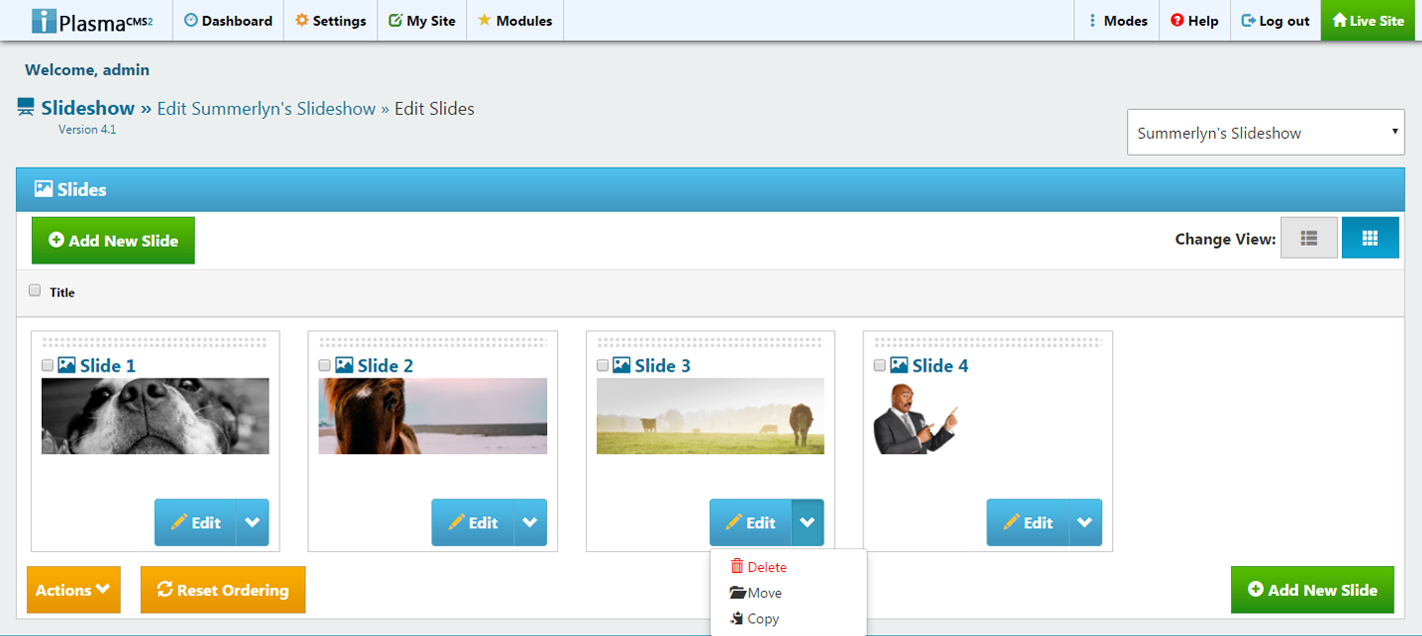
1.3b. To edit a slide, simply select the blue “Edit” button shown beneath each slide item.
1.3c. To delete a slide, click the down arrow on the right of the blue "Edit" button beside the slide you wish to delete. If you would like to delete multiple slides at once, simply select the slides to be deleted by clicking the checkbox beside the Slide Titles, click the orange "Actions" button, and select "Delete".
Embedding a Video as a Slide
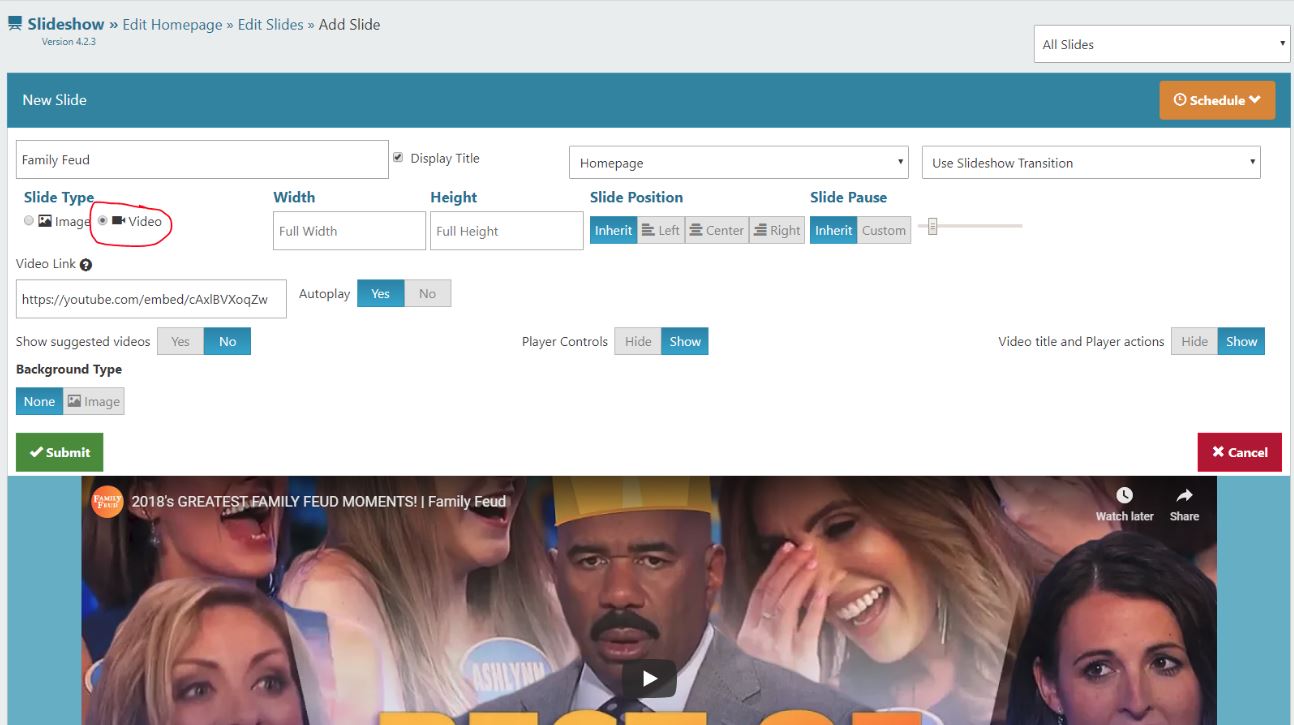
1.4a. Select "Video" under "Slide Type":
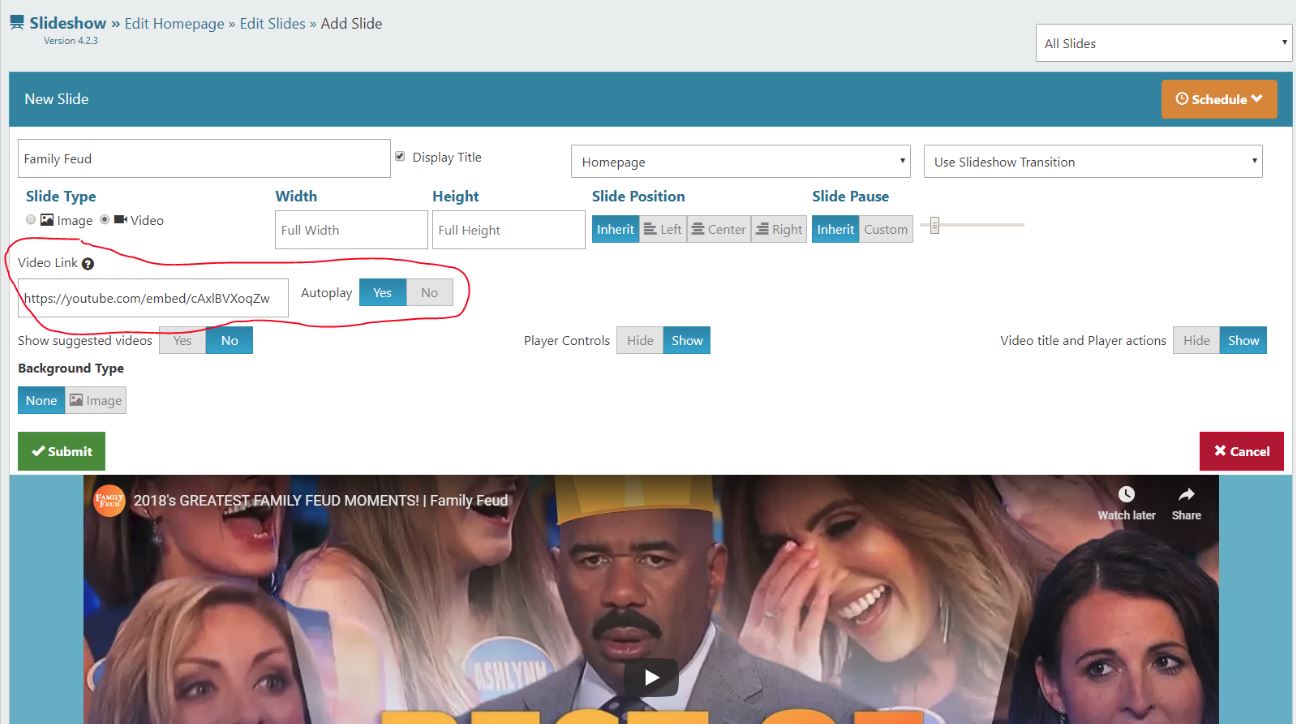
1.4b. Insert the link of the video you want to show up as a slide under "Video Link". You can click "Yes or No" under "Autoplay" if you would like the video to play automatically.
1.4c. Once you have your video linked, click on the “Submit” button.
Slideshows
Adding Slideshows
2.1a. Open the Slideshow Module and click the green “Add Slideshow” button in the upper right-hand corner of the screen. It will look like this:

The following screen will appear:
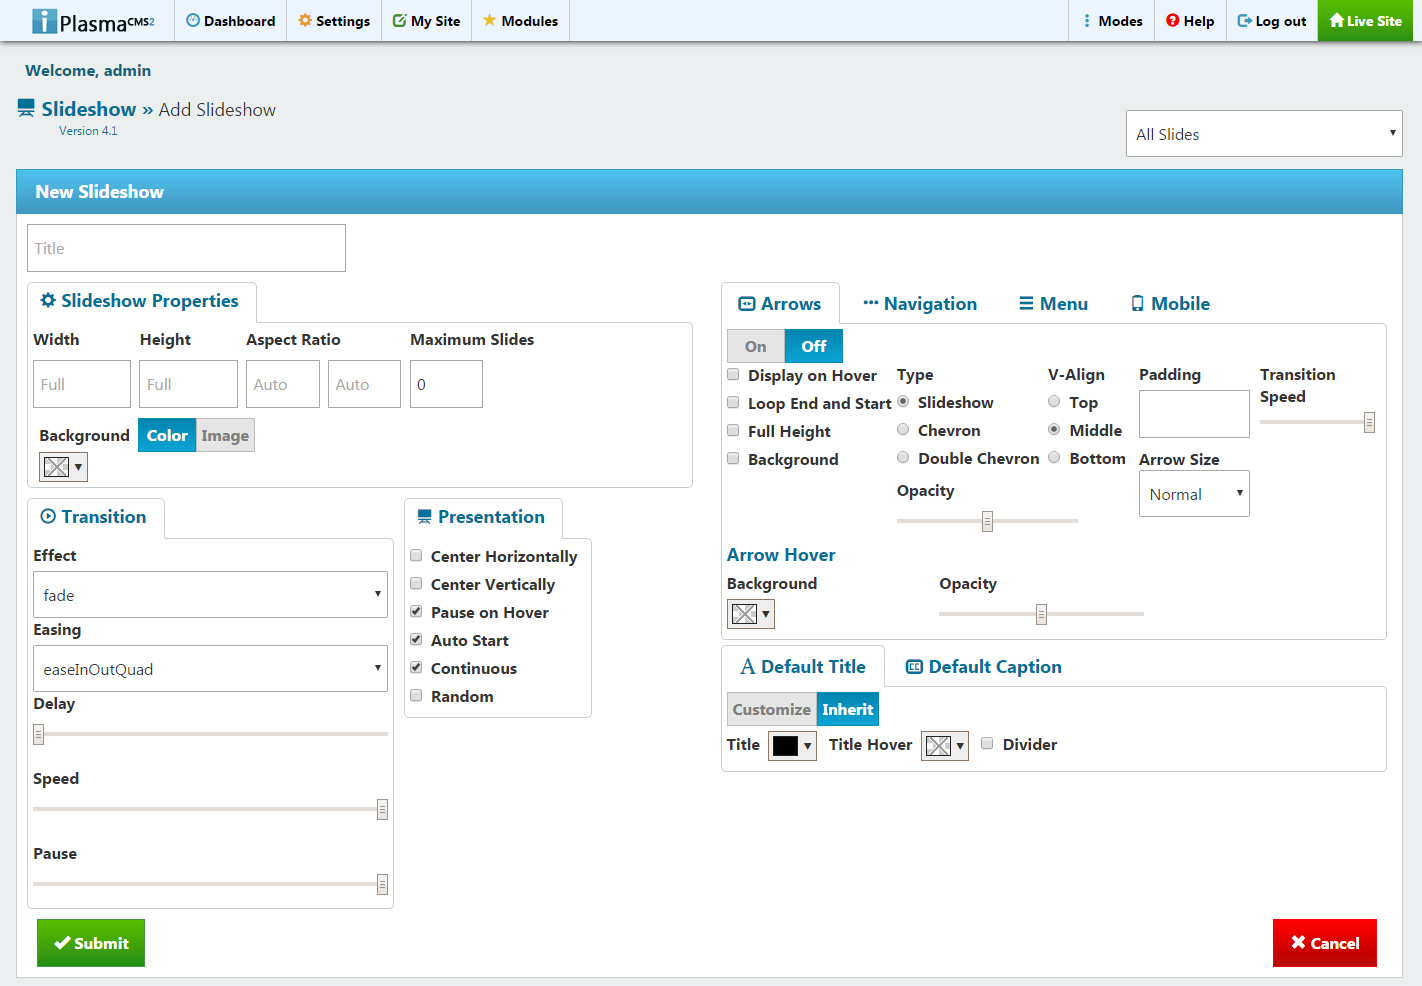
2.1b. Change the settings to your satisfaction.
- Make sure to give your Slideshow a Title.
- Set specific demensions for your Slideshow.
- You may set a Maximum amount of slides allowed for a Slideshow.
- Select a slideshow background (None, Color, or Image).
- Pick your Transition Settings (Includes Effect, Easing, Speed, and Pause).
- Select Presentation Settings (select one or multiple).
- Customize your Slideshow Navigational Features (Arrows, Navigation, Menu, and Mobile)
- Set Default Title and Caption Settings - This will be the default should you not select specific Title and Caption Settings within your individual slides.
- Click the green "Submit" button and start adding slides!
Edit Slideshow
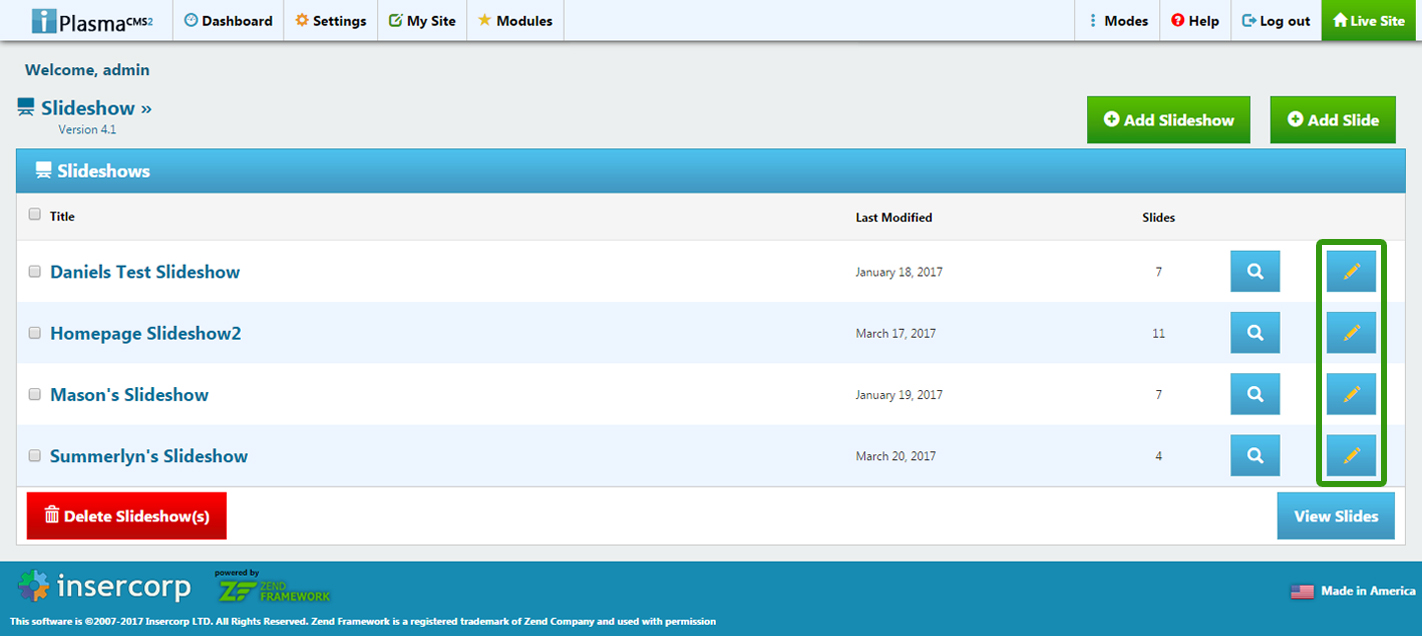
To edit a slideshow, click on the pencil icon button (Edit Slideshow button) located to the right of the magnifying glass icon buttons (View Slides for this Slideshow):
Delete Slideshow
To delete one or multiple Slideshows, select the checkbox next to the Title of the Slideshow(s) you want to delete, then click the red "Delete Slideshow(s)" button. The following pop-up box will appear:
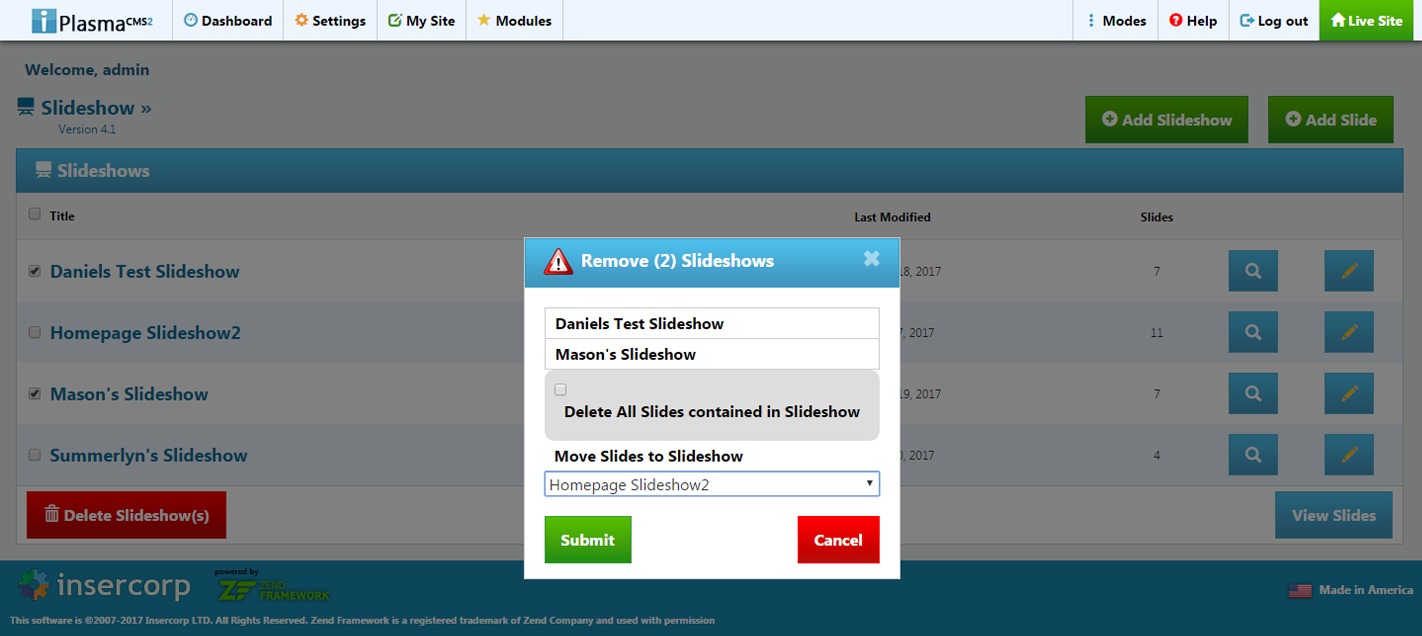
You can choose to delete all of the slides contained within the Slideshow(s) you wish to delete, or you can move the slides to a different Slideshow by clicking on the dropdown box and selecting the Slideshow you wish to move them to.




 Made in the U.S.A.